Working with submodules
Eventually, any interesting software project will come to depend on another project, library, or framework. Git provides submodules to help with this. Submodules allow you to include or embed one or more repositories as a sub-folder inside another repository.
For many projects, submodules aren’t the best answer (more on this below), and even at their best, working with submodules can be tricky, but let’s start by looking at a straight-forward example.
Adding a Submodule
Let’s say you’re working on a project called Slingshot. You’ve got code for y-shaped stick and a rubber-band.

At the same time, in another repository, you’ve got another project called Rock—it’s just a generic rock library, but you think it’d be perfect for Slingshot.
You can add rock as a submodule of slingshot. In the slingshot repository:
At this point, you’ll have a rock folder inside slingshot, but if you were to peek inside that folder, depending on your version of Git, you might see … nothing.
Newer versions of Git will do this automatically, but older versions will require you to explicitly tell Git to download the contents of rock:
If everything looks good, you can commit this change and you’ll have a rock folder in the slingshot repository with all the content from the rock repository.
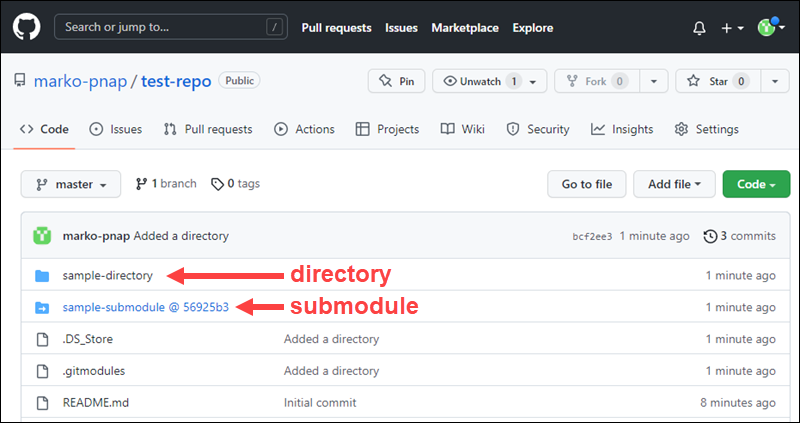
On GitHub, the rock folder icon will have a little indicator showing that it is a submodule:

And clicking on the rock folder will take you over to the rock repository.
That’s it! You’ve embedded the rock repository inside the slingshot repository. You can interact with all the content from rock as if it were a folder inside slingshot (because it is).
On the command-line, Git commands issued from slingshot (or any of the other folders, rubber-band and y-shaped-stick) will operate on the “parent repository”, slingshot, but commands you issue from the rock folder will operate on just the rock repository:
Joining a project using submodules
Now, say you’re a new collaborator joining Project Slingshot. You’d start by running git clone to download the contents of the slingshot repository. At this point, if you were to peek inside the rock folder, you’d see … nothing.
Again, Git expects us to explicitly ask it to download the submodule’s content. You can use git submodule update --init --recursive here as well, but if you’re cloning slingshot for the first time, you can use a modified clone command to ensure you download everything, including any submodules:
Switching to submodules
It can be a little tricky to take an existing subfolder and turn it into an external dependency. Let’s look at an example.
You’re about to start a new project—a magic roll-back can–which also needs a rubber-band. Let’s take the rubber-band you built for slingshot, split it out into a stand-alone repository, and then embed it into both projects via submodules.
You can take everything from the Project Slingshot’s rubber-band folder and extract it into a new repository and even maintain the commit history.
Let’s begin by extracting the contents of the rubber-band folder out of slingshot. You can use git filter-branch to do this, leaving you with just the commits related to rubber-band. The git filter-branch command will rewrite our repository’s history, making it look as if the rubber-band folder had been it’s own repository all along. For more information on git filter-branch, see this article.
The first step is to make a copy of slingshot to work on—the end-goal is for rubber-band to stand as its own repository, so leave slingshot as is. You can use cp with -r to recursively copy the entire slingshot folder to a new folder rubber-band.
It looks like rubber-band is just another slingshot, but now, from the rubber-band repository, run git filter-branch:
At this point, you’ll have a folder rubber-band, which is a repository that sort of resembles Project Slingshot, but it only has the files and commit history from the rubber-band folder.
Since you copied this from slingshot, the new repository will still have any remote tracking branches you setup when it was slingshot. You don’t want to push rubber-band back onto slingshot. You want to push this to a new repository.
Create a new repository for rubber-band on GitHub, then update the remote for rubber-band. Assuming you were calling the remote origin, you could:
Then you can publish the new “generic rubber-band module” with git push.
Now that you’ve separated rubber-band into its own repository, you need to delete the old rubber-band folder from the slingshot repository:
Then update slingshot to use rubber-band as a submodule:
Like we saw before when we were adding rock, we now have a repository-in-a-repository. Three repositories, in fact: the “parent” repository slingshot, plus the two “sub” repositories, rock and rubber-band.
In addition, if we dive back into slingshot‘s history, we’ll see the commits we originally made into rubber-band back when it was a folder—deleting the folder didn’t erase any of the history. This can sometimes be a little confusing—since the rubber-band “child” repository has a copied-and-modified version of those old slingshot commits, it can sometimes feel like you’re having déja vu.
Unfortunately, any collaborator who pulls slingshot at this point will have an empty rubber-band folder. You might want to remind your collaborators to run this command to ensure they have all the submodule’s content:
You’ll also want to add the rubber-band submodule to magic roll-back can. Luckily, all you need to do that is to follow the same procedure you used earlier when you added rock to slingshot, in “Adding a submodule.”
Advice on using submodules (or not)
- Before you add a repository as a submodule, first check to see if you have a better alternative available. Git submodules work well enough for simple cases, but these days there are often better tools available for managing dependencies than what Git submodules can offer. Modern languages like Go have friendly, Git-aware dependency management systems built-in from the start. Others, like Ruby’s rubygems, Node.js’ npm, or Cocoa’s CocoaPods and Carthage, have been added by the programming community. Even front-end developers have tools like Bower to manage libraries and frameworks for client-side JavaScript and CSS.
- Remember that Git doesn’t download submodule contents by default. If you’re adding a submodule to an existing project, make sure anyone that works on the project knows they need to run commands like
git submodule updateandgit clone --recursiveto ensure they get everything—this includes any automated deployment or testing service that might be involved in the project! We recommend you use something like our “Scripts to Rule Them All” to ensure that all collaborators and services have access to the same repository content everywhere. - Submodules require you to carefully balance consistency and convenience. The setup used here strongly prefers consistency, at the cost of a little convenience. It’s generally best to have a project’s submodules locked to a specific SHA, so all collaborators receive the same content. But this setup also makes it difficult for developers in the “parent” repository to contribute changes back to the submodule repository.
- Remember that collaborators won’t automatically see updates to submodules—if you update a submodule, you may need to remind your colleagues to run
git submodule updateor they will likely see odd behavior. - Managing dynamic, rapidly evolving or heavily co-dependent repositories with submodules can quickly become frustrating. This post was focused on simple, relatively static parent-child repository relationships. A future follow-up post will detail some strategies to help manage more complex submodule workflows.
Git Submodule Guide & Basic Commands to Get Started
Warning
update this!
Introduction
When developing an application using Git, it is practical to integrate code available in other repositories. Reusing the code shortens development time and conserves resources.
Copying repository contents directly into the project is an adequate solution in some scenarios. However, merging customizations with future upstream changes can be challenging. Submodules are a Git feature designed to address this issue.
This guide will show you how to work with Git submodules and provide a list of the most frequently used commands and their options.

Prerequisites
- Git installed (refer to our installation tutorials for Windows, macOS, CentOS 7, CentOS 8, and Ubuntu).
- GitHub account or access to another Git repository hosting service.
What is Git Submodule?
A Git submodule is a feature that allows the integration of multiple independent repositories into a single project. A submodule acts as a subdirectory within the main project directory, but the code it contains does not have to be copied directly into the project.
Instead, Git creates a reference to the submodule's repository and places it inside the main project's repository. The image below shows a submodule in a repository hosted on GitHub.
Why Use Git Submodules?
Git submodules are helpful when working with complex projects. For example, developers of microservice-based apps can design and update each microservice separately to preserve independent change histories.
Another benefit is that multiple projects can share the code maintained in a single repository. This way, developers ensure consistency between various products using the same feature.
The Git command-line interface has a dedicated subcommand for manipulating submodules. Use git submodule to create, update, and manage submodules.
The sections below list the most common git submodule commands and their options.
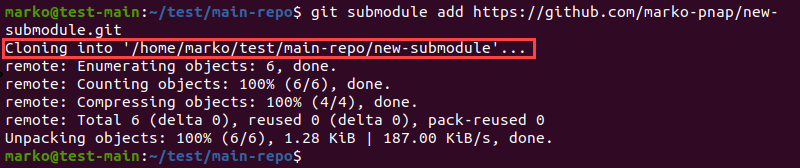
git submodule add
Add a submodule to your main repository using the git submodule add command.
To do so:
1. Go to the main directory of your project:
2. Provide the URL of the submodule's origin repository to the add command:
The output shows Git cloning the repository into the project's subdirectory.
To specify the path and name of the directory containing the submodule, add the path argument to the command:
The following example clones the repository new-submodule into the submodules/example path:
If you do not specify a path, Git defaults to the repository name.
Note: Use the -b option to specify a non-default branch for the submodule.
git submodule init
When cloning the repositories that contain submodules, you must initialize the submodules with the <a href="https://phoenixnap.com/kb/git-submodule-init" target="_blank" rel="noreferrer noopener">git submodule init</a> command:
The command registers the paths to submodules within the project tree.

To initialize a specific submodule, add its path to the command:
git submodule update
Update the state of the submodules in the project with the following command:
The command clones the missing submodules, fetches any new remote commits, and updates the directory tree.

Adding the --init flag to the command eliminates the need to run git submodule init. The --recursive option tells Git to check the submodules for nested submodules and update them as well.
git submodule status
Check the status of the submodules by typing:
The command prints out the SHA-1 and the path of each submodule.

The SHA-1 string can have three different prefixes.
- The - prefix marks an uninitialized submodule.
- The
+sign shows that the checked-out submodule commit differs from the state of the original submodule repository. - The
Uprefix alerts to merge conflicts.
Note: No prefix means that the submodule is initialized, synchronized with the origin, and has no conflicts.
Use the --recursive option to include nested submodules in the status report.
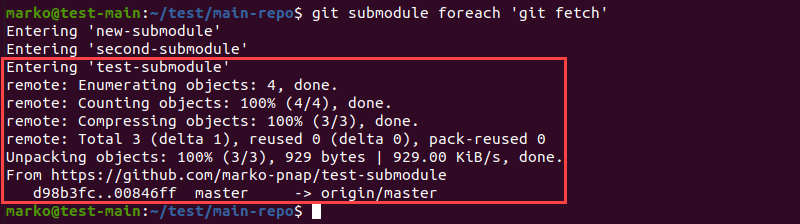
git submodule foreach
The git submodule foreach command allows executing a command on each submodule. Use the following syntax:
For example, to perform the fetch action on each submodule, type:
The example output shows Git checking submodules and fetching new data for the test-submodule.
git submodule deinit
Unregister a submodule by typing the following command:
Git removes the content of the submodule directory and deletes the section of the .git/config file relevant to the submodule.

De-initialize a submodule containing local modifications by adding the --force option:
Working with Git Submodules
In projects that utilize submodules, the workflow must include submodule management. The sections below deal with the most common submodule operations, such as:
- Creating submodules from subdirectories.
- Pulling changes from submodule and project remotes.
- Merging and publishing submodule changes.
- Using aliases.
Joining a Project Using Submodules
If a project contains submodules, follow the steps below to obtain a full local copy:
1. Clone the repository:
The output of the git clone command confirms the successful cloning.

The directory with the cloned repository contains all the files and subdirectories of the original repository. However, the submodule directories are created empty and uninitialized.
2. Initialize the submodules and clone their contents by typing:
Git registers the submodules, clones the related files, and checks out the path of each submodule.
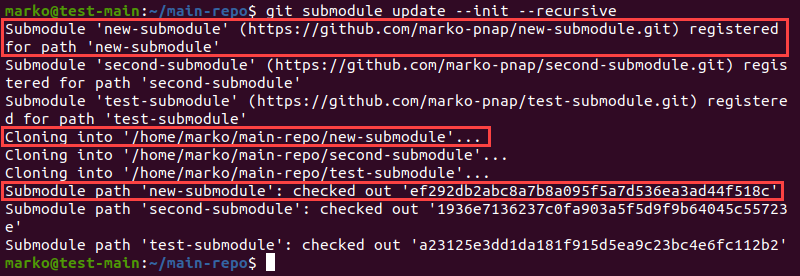
Alternatively, perform all the above actions using a single command by adding the --recursive flag to git clone.
Switching From Subdirectories to Submodules
If you start using submodules in a project that is already in progress, subdirectories containing the relevant code need to be turned into submodules. The simplest way to perform this switch is using the procedure below.
1. Recursively copy the contents of the entire project directory to a new location:
2. Go to the new directory and execute the git filter-branch command. Use the --subdirectory-filter option and provide the name of the subdirectory containing files for the new submodule.
The example below uses git filter-branch to remove everything except the contents of the test-dir directory.

3. Create an empty repository to store the new submodule and copy the URL. If you use GitHub, read how to create a new repository on GitHub.
4. On the local system, set the new remote origin for the submodule repository:
5. Push the changes to remote.
The contents of the submodule directory are uploaded to the repository you created.

6. Return to the main project's directory and remove the subdirectory containing the code that now belongs to the new submodule.
7. Commit the changes with:
8. Push the changes to remote.
9. Use the git submodule add command to add the submodule to the project.
Pulling Changes From the Submodule Remote
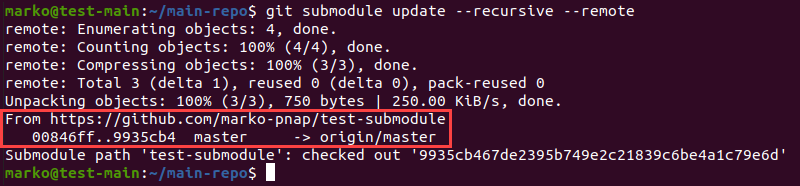
A frequent usage scenario for submodules is utilizing their code without changing it locally. In this case, updating submodules with new content from their remote origin is performed with the following command:
The output shows the submodule's remote origin and confirms the successful update.
Pulling Changes from the Project Remote
If a submodule is changed as a part of the superproject's commit, pull the changes by following the procedure below:
1. Execute git pull:
2. Update the submodules.
The --init flag in the command above is important in case new submodules have been created in the remote commit.
Publishing Submodule Changes
Changes made on a submodule locally are published similarly to any other repository changes in Git. The only difference is that the command execution takes place in the submodule directory.
To publish the changes:
1. Go to the directory containing the submodule.
2. Use git add to choose which files to commit.
3. Commit the changes.
4. Push the changes to remote.
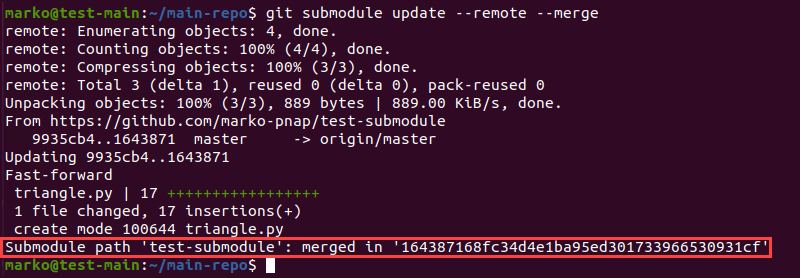
Merging Submodule Changes
To merge upstream changes to submodules with the local versions, type:
To merge the main project's gitlink changes into the submodules, type:
Using Aliases
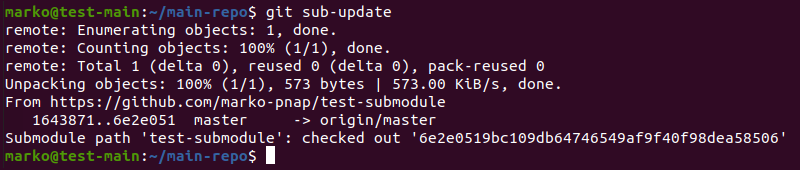
Most of the commands related to submodule management in Git are long. To simplify frequently performed actions, create aliases for the commonly used commands.
The syntax for creating an alias is as follows:
For example, to create the sub-update alias which replaces the submodule update --recursive --remote command, type:
Test the new command alias on your system:
The output of the alias is the same as the output of the original command.
Submodules and Branch Switching
Switching to a new submodule branch in Git is performed using the git checkout command. Execute it from the submodule directory, adding the name of the branch you want to switch to:
The output confirms that the new branch is checked out.

If you are checking out a new branch for the entire project, add the --recurse-submodules flag to properly transfer the state of submodules.
Note: With older Git versions that do not support the --recurse-submodules option, use the git submodule update --init --recursive command to restore the state of submodules after the checkout.
Conclusion
This guide aimed to provide a simple overview of Git submodules, focusing on the most frequently used commands and workflows.
If you need a comprehensive general introduction to Git, read our beginner's guide to Git.